
Marketing
Because MetMessage’s core design philosophy is to keep both data and logic on the client app, the server is responsible for forwarding messages only.
Setting up your own MetMessage server is very simple. In this post, I’ll show you how to quickly and easily deploy a dedicated server.
PS: I hope to find time in the future to provide a one-click deployment service for everyone—stay tuned.
Benefits of a Dedicated Server
MetMessage Security Logic 1
The app is installed on my own phone—secure! The server only forwards messages and knows nothing—secure!!
MetMessage Security Logic 2
I trust my friends. Every contact in my MetMessage is someone I actually know.
The face-to-face QR code scanning mechanism for adding friends enforces trust by design. Sorry, but strangers from the internet simply cannot be added.
All data is stored on my phone and on my friends’ phones—so what is there to worry about?!
MetMessage Security Logic 3
Deleting the app removes everything—regrettable in some ways, but also great for privacy.
Download the Application Package
You’ll first need to download the application package from GitHub. If you have some Java development experience, you can also clone the source code and compile it yourself.
Find the Releases section on the right side and download the JAR file.
Purchase a Hosted Virtual Machine from a Provider
The most critical part of a dedicated server is having a publicly accessible internet address that your phone can reach. The easiest way is to apply for a free or paid hosted virtual machine.
Since this is a dedicated server, we recommend purchasing the most basic (i.e., cheapest) plan.
Using Alibaba Cloud as an example, here is the purchase process:
URL: How to purchase a cloud service
Set Up Your Own MetMessage Server
Step 1: Log in to your purchased Alibaba Cloud hosted virtual machine. For detailed steps, refer to the Alibaba Cloud purchase guide.
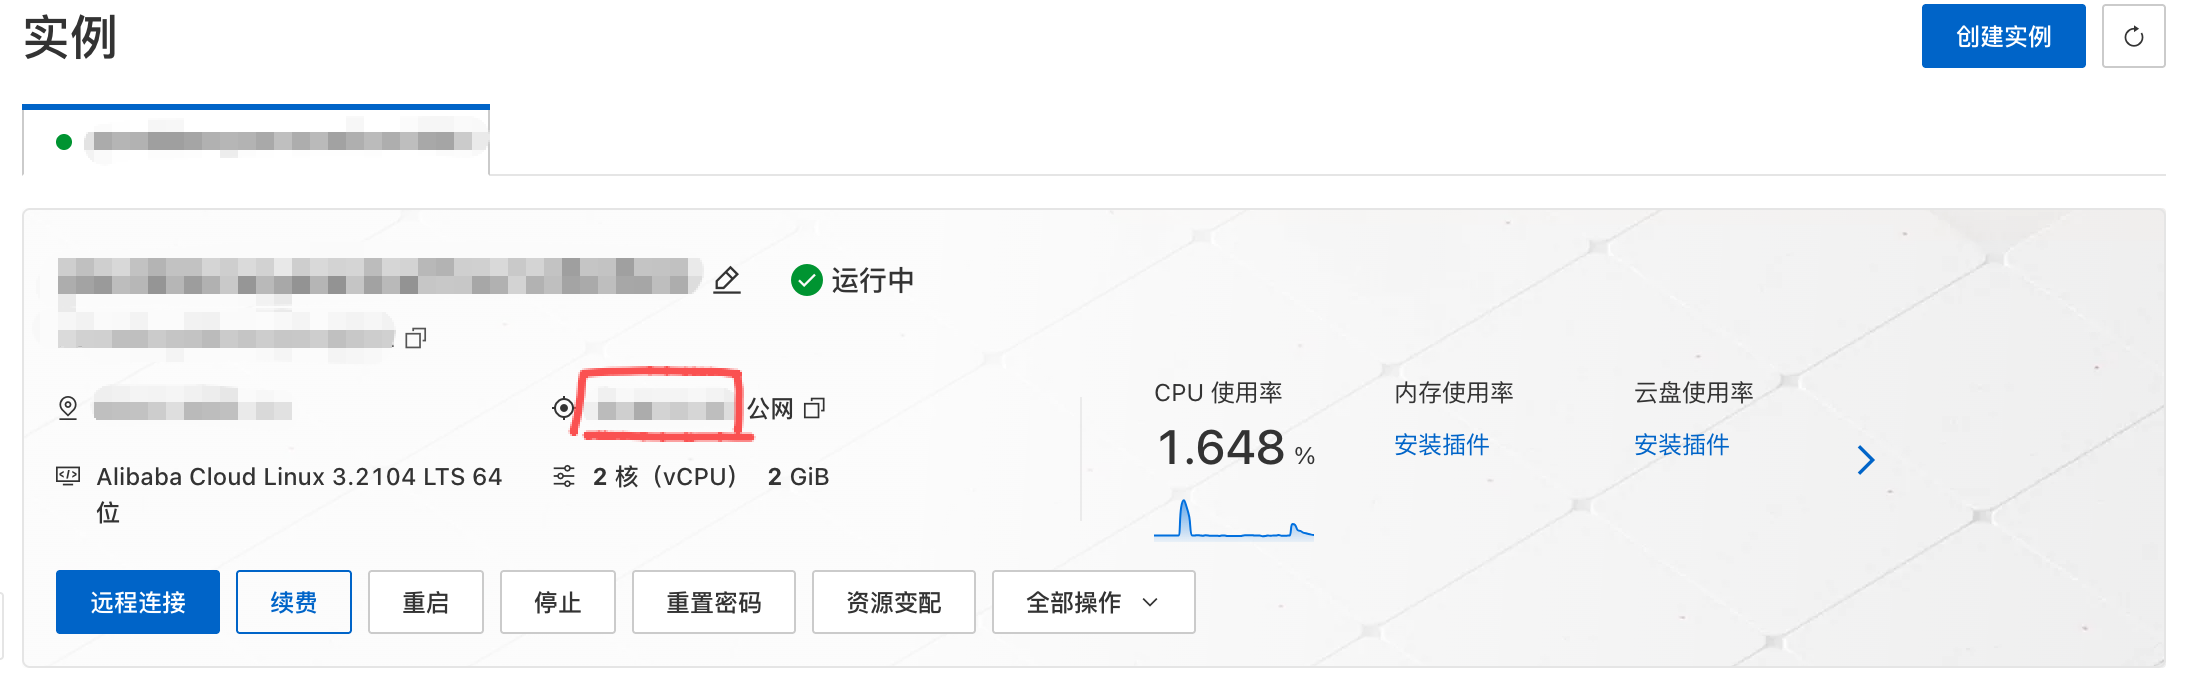
On the landing page after login, you will see your public internet address—it appears in the format xxx.xxx.xxx.xxx. Please note this down, as it is the dedicated server address you’ll need to enter in the MetMessage app.
The red box in the image below highlights your internet address.
Step 2: Establish a remote connection
Using a remote connection, you can upload the JAR file downloaded to your local machine onto the server.
To clarify: when you chat with friends, messages are sent from your phone to your friend’s phone (and vice versa) via a server deployed on the internet—and that’s exactly what we are building here.
-
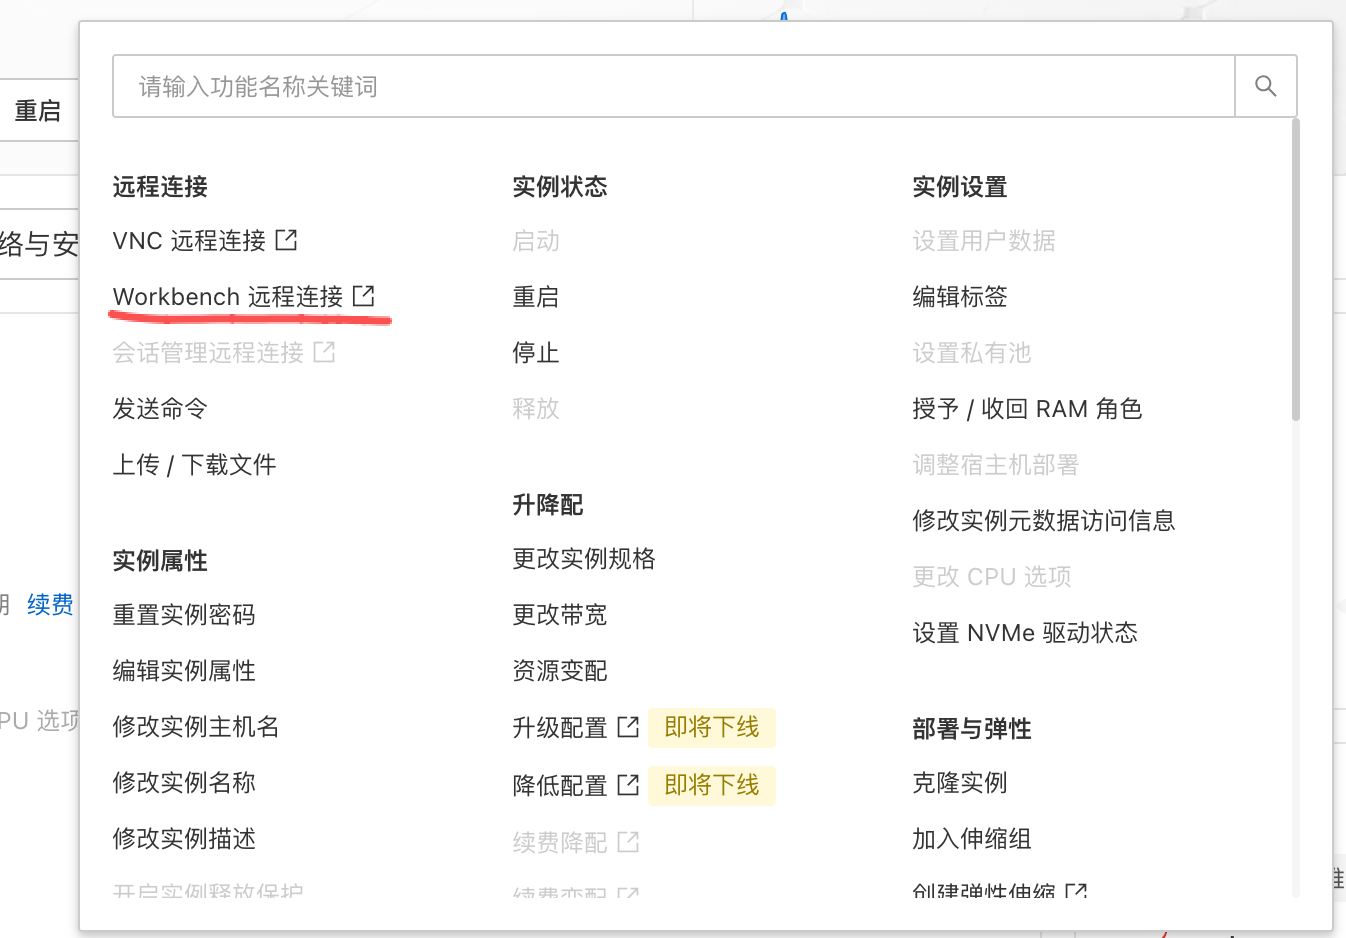
In the image above, locate the “All Operations” button. Click it to reveal more options, as shown below.
-
Select “Workbench Remote Connection” (highlighted with a red underline in the image).
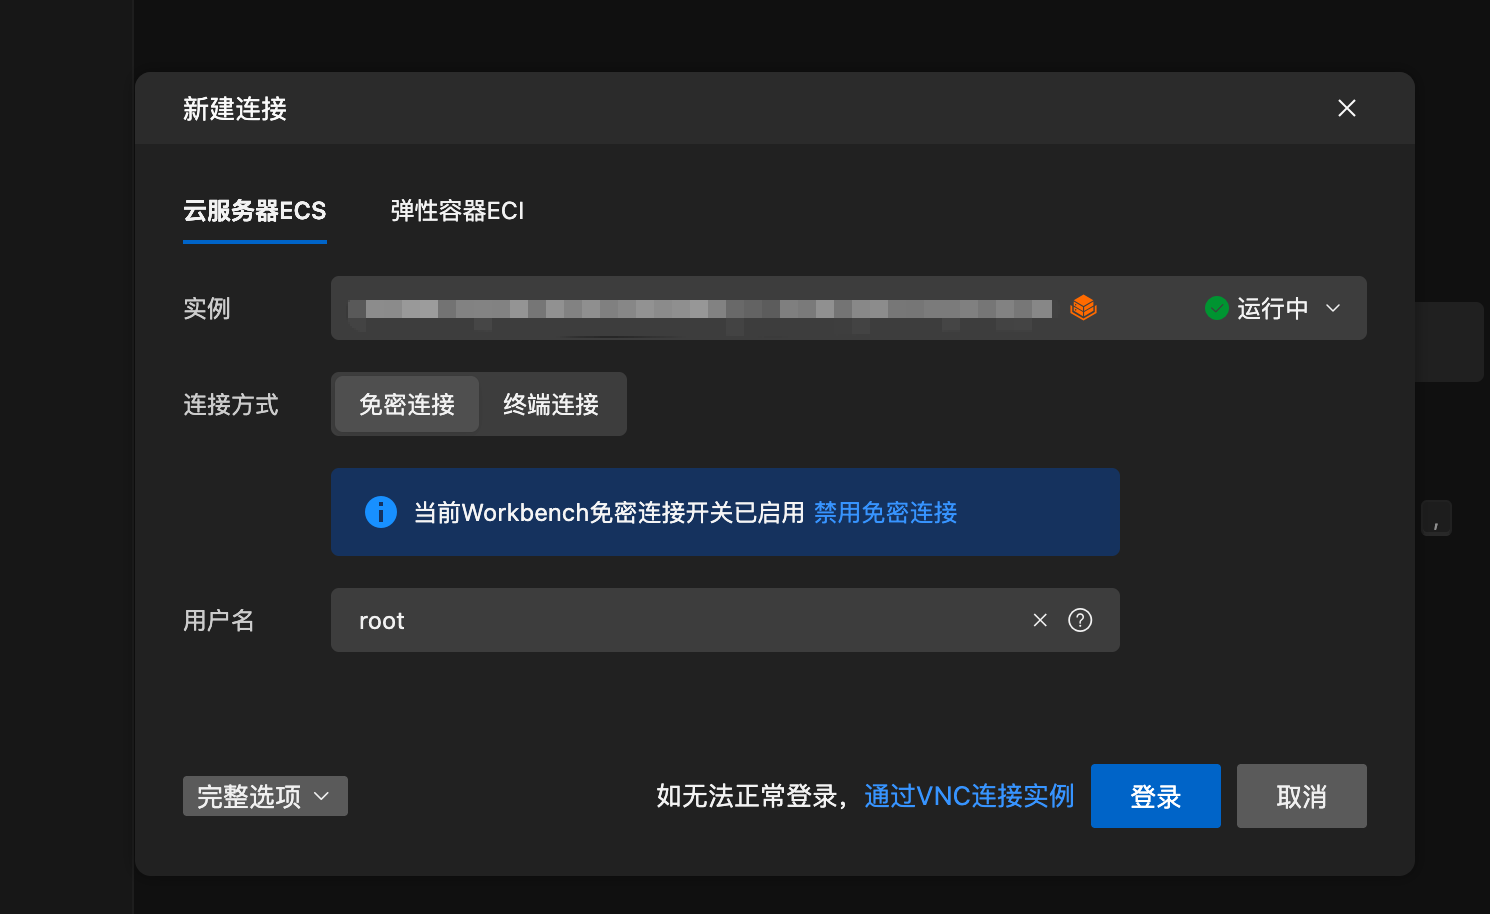
- A “New Connection” dialog will appear. No changes are needed—just click “Login”, as shown below.
- After logging in, you will enter a command-line interface. Don’t worry about it for now—directly click the folder icon on the left side, as shown below.
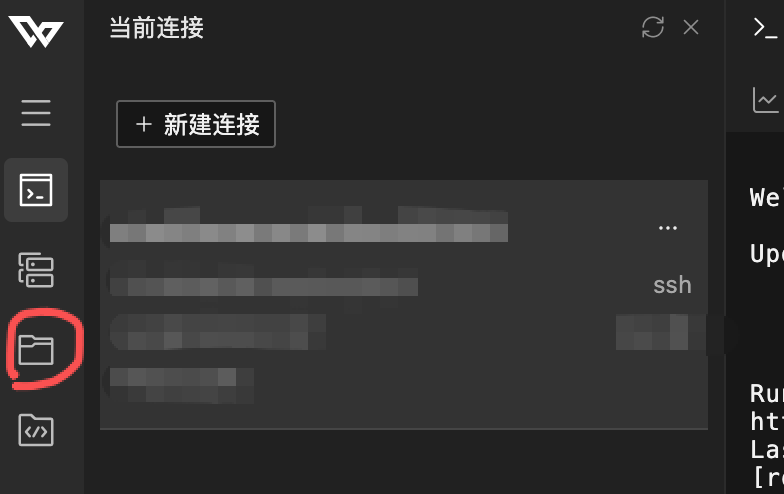
- After clicking the folder icon, the server’s file directory will expand. Right-click on the
rootfolder and select a subfolder—I choseworkspace. You can also create a new folder or userootdirectly, as shown below.
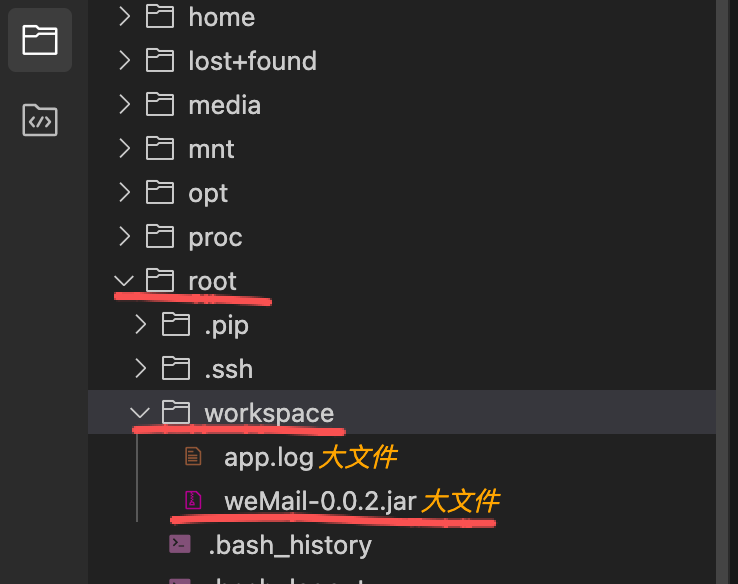
Right-click on workspace (or your newly created folder) and select the “Upload” option from the context menu, as shown below.
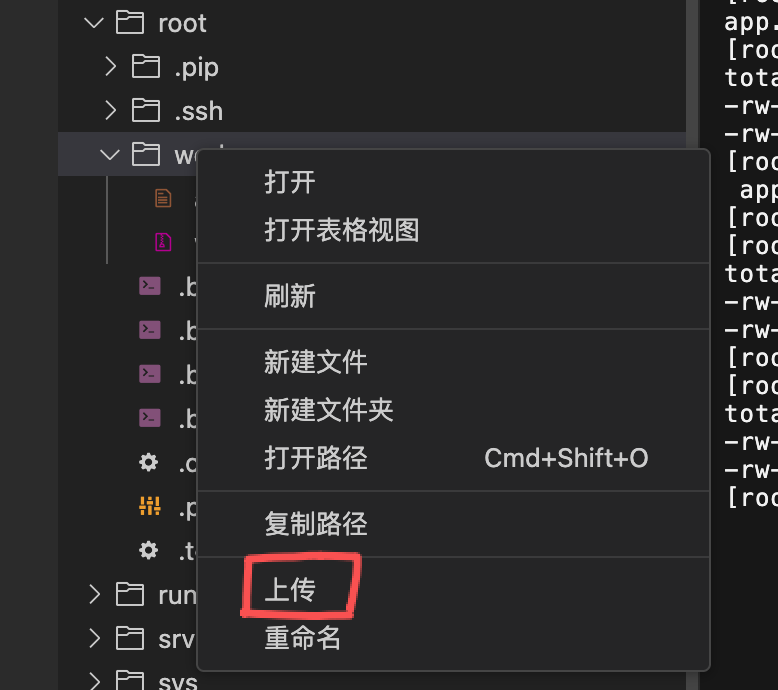
- After clicking “Upload”, a local file browser will appear, showing your computer’s disk directories. Navigate to the JAR file you downloaded earlier, select it, and click “Confirm” to complete the upload, as shown below.
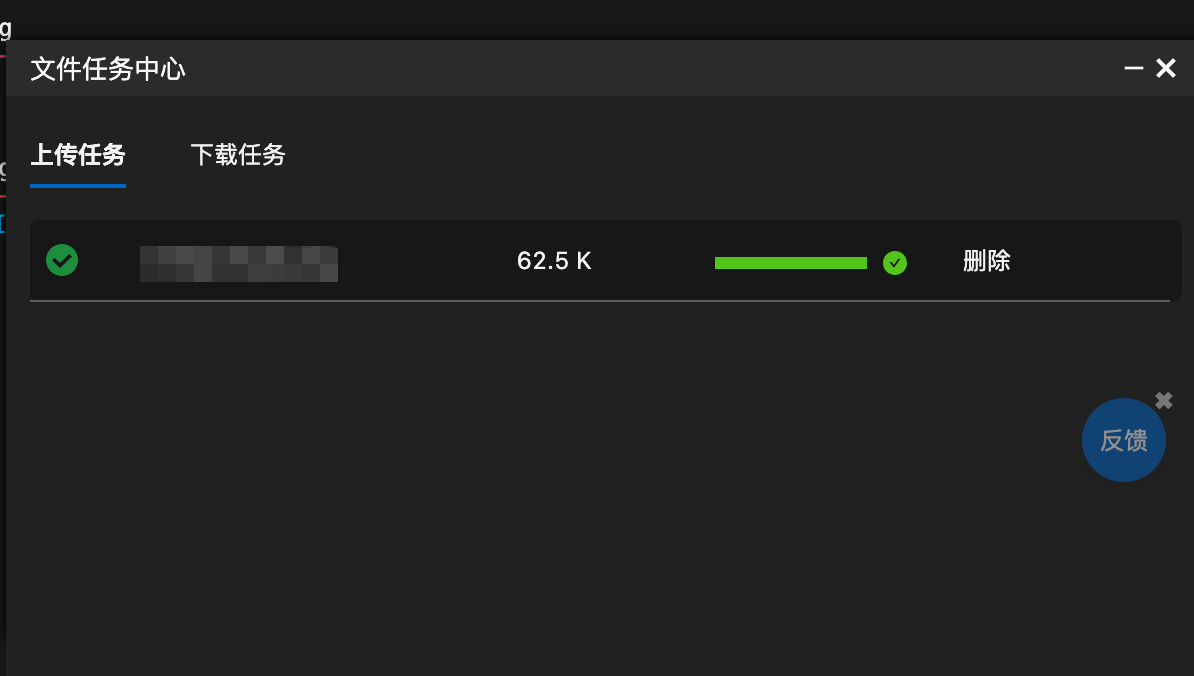
-
Now it’s time to use the command-line interface. Refer to the commands below to start the application:
(1) Check the current directory: pwd
(2) Navigate to the folder containing the JAR file: cd /root/workspace
(3) Start the application: nohup java -jar weMail-1.1.0.jar > app.log 2>&1 &
8: Verify that the application service is running successfully.
Go back to your local machine and open a command-line interface. Enter the following command to test the service:
(1) telnet xxx.xxx.xxx.xxx 12345
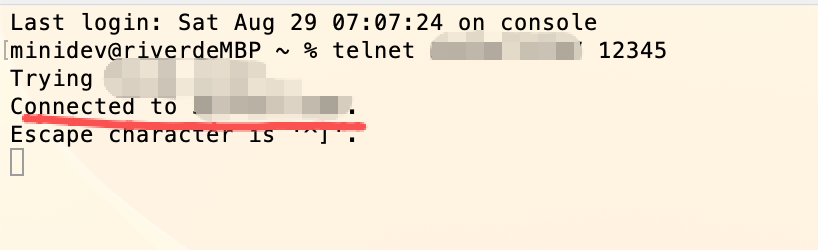
If you see output similar to the image above, congratulations—you’re all set!
You’ll then need to configure this internet address in your MetMessage app on your phone.
URL:How to configure the app
